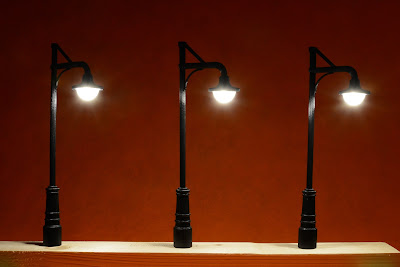
Quick search using the "g scale" keyword revealed several design that could be of interest. A set of street lamps created by user SlashDev caught my eye and I decided to make it my first project.
I've downloaded the necessary files and made some modifications to the original design:
- I've made the lamps a little taller
- I've added an anchor allowing installation in a drilled hole
- I've designed a glass shade for the lamps
After that, the printing was easy. It all worked right away. Each lamp is printed as two pieces which need to be glued together later on. Each half takes about 2 hours to complete using the high quality settings.
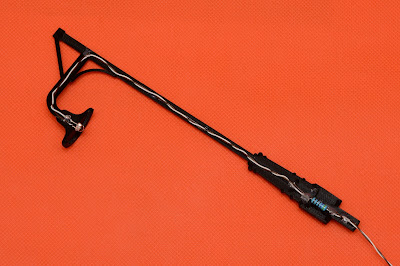
The light poles are empty inside which ensures the space for all necessary wiring.
A 5mm LED and a resistor fit perfectly inside the body.
A hot glue gun can be used to help hold everything in place and make the next step easier.
All that is left is gluing the two pieces together. The lamp is (almost) ready.
And it just works. At this point I've realized I wanted a glass shade to make the light more diffused.
Designing the globes was very easy. Each is just a half of an empty sphere. I have to say I really like what I've made here.
A two-arm variant is a similar story. It's equally easy to print and wire up.
There are a few challenges that should be mentioned:
My cheap printer is not perfect. And the two sides of each lamp do not fit each other 100%. This was however to be expected from o DIY machine, and they fit well enough to be perfectly usable.
The material I've used for printing is called PLA. It's very easy to use but probably not that weather resistant. Actually it's advertised as biodegradable. The time will show how well this kind of plastic can survive my outdoor conditions.
Gluing was not a piece of cake. The best glue for PLA is the cyanoacrylate. I was however afraid to use it considering how quickly it acts. I've used a regular plastic cement instead. It worked but required some patience. We'll see whether it holds in the long term...
Being a contributor by nature, I've decided to share my modified design for the lamps. The files necessary for printing can be downloaded here: http://www.thingiverse.com/thing:2064924
I've printed all the lighting I needed for my railway platforms. The next step is producing around 40 of roadside lamps. I'm going to design those by myself from scratch. And you can definitely expect another blog post covering exactly that :)


Thanks for sharing you experience. Did you do any finishing to the surface of the lamps? Did you use transparent PLA for the globe?
ReplyDeleteI did not add any finishing. The print is good enough when you look at it from some distance. Yes, transparent PLA is used for the globe.
DeleteTomasz,
ReplyDeleteLove your models. When I downloaded from Thingiverse there was only one file for the OneArmLamp. Shouldn't there be a left and right half file?