Recent Posts

Showing posts with label any scale. Show all posts

Wednesday, 26 September 2018

Piko 35013 switch decoder with Trix mobile station

It's autumn already. The outside temperature went down by a lot and there's no denying, the garden season is over. It's time to go back to indoor activities. In my case this means working on my new N-scale layout inside a coffee table.

I haven't made much progress so far on this project, but this is going to change now. I've decided the first step would be to finalize my DCC wiring. In particular - I want all my turnouts to be controlled digitally. Previously I would use Digitrax DS64 decoders for that purpose but my experience with those was not good at all. So this time I'm giving Piko decoder a try. And since my new layout will be driven by a Trix central station, some validation of the setup is needed.

Today I'm going to check the compatibility between Trix 66955 mobile station and the Piko 35013 switch decoder. This is going to be similar to my previous tests involving Roco z21.

Trix 66955 and Piko 35013

My first test involves the mobile station, the decoder and a dummy target. This target is just an electrical circuit featuring some LEDs and resistors. I do not want to use the real turnouts right away, since they draw a lot of power and I'm just testing digital compatibility here.

The results are very promising - by invoking functions on the Trix device I'm able to light up all of my LEDs. All four outputs work and their polarization is correct. The digital compatibility is confirmed.


Let's try with some real turnouts now. The challenge here is with the electrical current that is required to flip the switches. Digitrax DS64 decoder features a big capacitor that is discharged whenever an action is needed. This in turn ensures a short but large electrical current.

Piko 35013 is different. It simply takes the power directly from the main DCC signal. Will the Trix mobile station provide enough current the re-route the turnout? Let's see...

I'm going all the way, and I'm connecting two Kato N-scale turnouts to one output of the decoder. This basically means I will use double the power that is normally required. I press the button and... it works!

Piko 35013 and kato unitrack turnouts n scale

Yes, the Trix mobile station was able to provide enough of a charge. This device is rated 1.9A, so - from an electrical standpoint - it was actually expected to work, as each turnout is a 20Ohm load. Well, I'm certainly glad it did!

Here's a short video documenting my test:


One thing that I struggled with previously during my Roco z21 compatibility tests was the "LED constant output" mode of the Piko 35013 decoder. I could not make it work at all. I assumed the Roco central station had a difficulty programming the decoder, and I hoped this functionality could still be enabled with a controller from a different manufacturer.

Unfortunately I have to report that the mentioned mode does not work with the Trix mobile station, either. The Trix unit does not seem to have any difficulty programming the decoder, so I'm pretty confident I'm enabling the "LED constant output" mode correctly. But it still does not work and I do not know why. Perhaps it's implemented in a non-standard way and will operate only when triggered from a Piko DCC station.

But overall the tests are still a success. Piko 35013 can be used for N-scale turnouts and it can be driven from a Trix mobile station. This will be my solution for the coffee table layout. And I'm very happy I do not have to deal with any Digitrax equipment anymore... :)

Monday, 10 July 2017

Piko 35013 switch decoder with Roco Z21

My garden layout was always supposed to be fully DCC controlled. After putting money into my digital setup and the locomotives (here and here), the next step was enabling the handling for rail-track switches. Luckily the product needed for that is easily available and is not even extremely expensive considering its functionality.

Piko 35013 is a switch decoder dedicated for G-scale usage. It offers 4 independent and programmable outputs. Moreover each output can serve two switches at once, so with some clever design one could control up to 8 switches using one device. This may be more than many of us have on our layouts, including myself. And that means I had an option to go full digital for just 70 Euro.


The product comes in a standard Piko box. The content includes the device itself and a detailed manual. The decoder is secured inside the package with a properly shaped piece of a cardboard. Everything arrived unscathed.


The manual covers all important topics and is bilingual including German and English descriptions. Everything is explained very clearly with pictures and wiring diagrams.


There are some points in the manual worth mentioning:
  • The declared minimum input voltage for the device is 12V. This means the product could be potentially used also for smaller scales. That's some interesting news and it makes it a reasonable alternative for the Digitrax DS64 decoders that I'm using on my N-scale layout.
  • Piko claims the outputs are short protected. That's really great and it turns the decoder into an even more interesting option for replacing Digitrax. DS64's outputs are not protected at all and that forced me to send the units for repair twice already.
  • The decoder offers different modes for operating the outputs. It can drive 2-wire and 3-wire switches, as well as LEDs and light bulbs. This all looks very promising (and again - seems like much more than the functionality of Digitrax).
The decoder itself is just a small black box.


Upon opening the cover, we gain access to its terminals. Those include: one input, four outputs and a programming jumper.

The PCB seems to be covered with some sort of a lacquer. This is probably the way the device is made weather resistant. Looks very solid!


First tests with Roco Multimaus and LEDs connected to the outputs. LEDs are blinking and everything seems to work just fine...


An important point to remember here is the different numbering scheme used by Piko and Roco. There's a +4 shift in digital switch addresses. So in order to use Piko switch #1, we need to target address #5 on the Roco Multimaus controller.

The next tests involved Roco z21 station with mobile application control. Again - everything behaved correctly... And again, the already mentioned address shift is in effect forcing me to adjust addresses on the z21 application.


I have tested 3 configurations in total:
  • Roco Multimaus -> Roco 10764 station -> Piko 35013 decoder -> 2 x Piko 35271 switches
  • Z21 Mobile App -> Roco z21 -> Piko 35013 decoder -> 2 x Piko 35271 switches
  • Z21 Mobile App -> Roco z21 -> Uhlenbrock Power 8 booster -> Piko 35013 decoder -> 2 x Piko 35271 switches

In all those configurations my setup worked correctly for basic operations. I was very afraid of adding the booster to the chain but it did not have any bad effects. The switches could still be controlled easily and it worked just great!

And that's when I've decided to try something more. I needed only 3 out of the 4 available outputs for the switches on my layout and I thought it would be a good idea to use the last one for something else. Traffic lights were my preferred choice. After all the decoder had the "LED constant output" mode and it should be usable for choosing red and green signals.

I tried it... and it did not work. I've had huge problems programming the decoder using Roco z21. The station could neither write or read the CVs properly. I've even used the z21 Maintenance desktop application and it seemed to work but the "LED mode" was still not enabled. I've spent three afternoons trying different ideas but it was all for nothing...

Here's a video documenting the initial success and the later failure.


I've contacted both Piko and Roco to get some insight on possible cause of the incompatibility. Unfortunately at the time of writing this post, the issue is still not solved. I suspect Roco z21 is simply not able to program the decoder. And I also suspect that if I used a different station to change the relevant CVs, I would later be able to operate the "LED mode" from z21.

The summary is: Roco z21 can be used to operate Piko 35013 but it cannot be used to program any new behavior.

Alright, but the basic switching still works perfectly fine. I've installed the electric mechanisms (Piko 35271) on my layout with all the wiring...


...connected it to the decoder...


...and hid the device under one of the buildings to add some weather protection.


It all works. My switches can be operated remotely now. The layout is fully DCC enabled. Success? Yes, but I somehow still wish I could add the traffic lights, too...

Wednesday, 18 January 2017

Anet is the new Pola?

Bringing our miniature worlds to life requires a lot of elements. Houses, streets, lamps, people, animals and much, much more. Those items can be purchased but they're not cheap. Or they can be made if you have the required skills. What can a software engineer like me (who barely knows how to hold a hammer) do in such case? Well, he can use his computer skills to 3D print whatever he wants!

3D printers have become pretty cheap lately. Or at least the Chinese clones have. A promising 3D printer can be bought for less than $200 dollars. And to satisfy my curiosity, I've decided do get such device...

The model I've picked is called Anet A6. It's a very popular printer with a huge and active community of users. It comes as a DIY kit packaged in a medium-sized but rather heavy square box.


The content is not surprising. A lot of mechanical and electrical elements. It all has to be assembled by the user.


It took me almost an entire day to build it. The parts are good quality and fit perfectly BUT the manual is a joke. The assembly is really fun however and it allows you to learn how the printer actually works. Not to mention the feeling of pride when it's finally functional!


And did it work? It worked right away! As soon as I managed to solve some basic issues, I was able to print my first 3D elements. And so it started: boxes, scissors a whistle and other useless stuff...


But this new purchase was supposed to help me with my train layout, wasn't it? So let's see how we can use the printer for that purpose!

It seems we could easily print a street lamp...


...or an outhouse...


...or a boat for my pond...


...or... anything we can imagine?

My first impression is that the cheap printer is not perfect. It requires learning, attention and maintenance. The print quality however is definitely good enough to support my G-Scale modeling. A smaller scale would require a much more precise device but for large items - Anet has the potential to replace Pola G (at least for basic cases).

This new experience opens also a new field to explore on my blog. I'm not going to stop writing about commercial products but I will be sharing my 3D printing successes (and failures), too. And I hope all of you will enjoy that!

Tuesday, 15 September 2015

Interior lighting tuning

In one of my previous posts I have described my method of adding interior lighting to a G scale passenger car. And since I own more than one, I wanted to equip all of them with lighting kits. So I went ahead and created three more.


Nothing new here of course. Maybe except for the fact, that those kits definitely turn out better and better with each piece I make. Perhaps one day I should be selling them?

But let's get back to the topic. One thing I did not like that much in the kit I made for my first car was that the light was not bright enough. I've used there a 4.7kOhm resistor, exactly the same that I use in N scale. Seems it was just too much for a G scale model and I decided to do something about it.

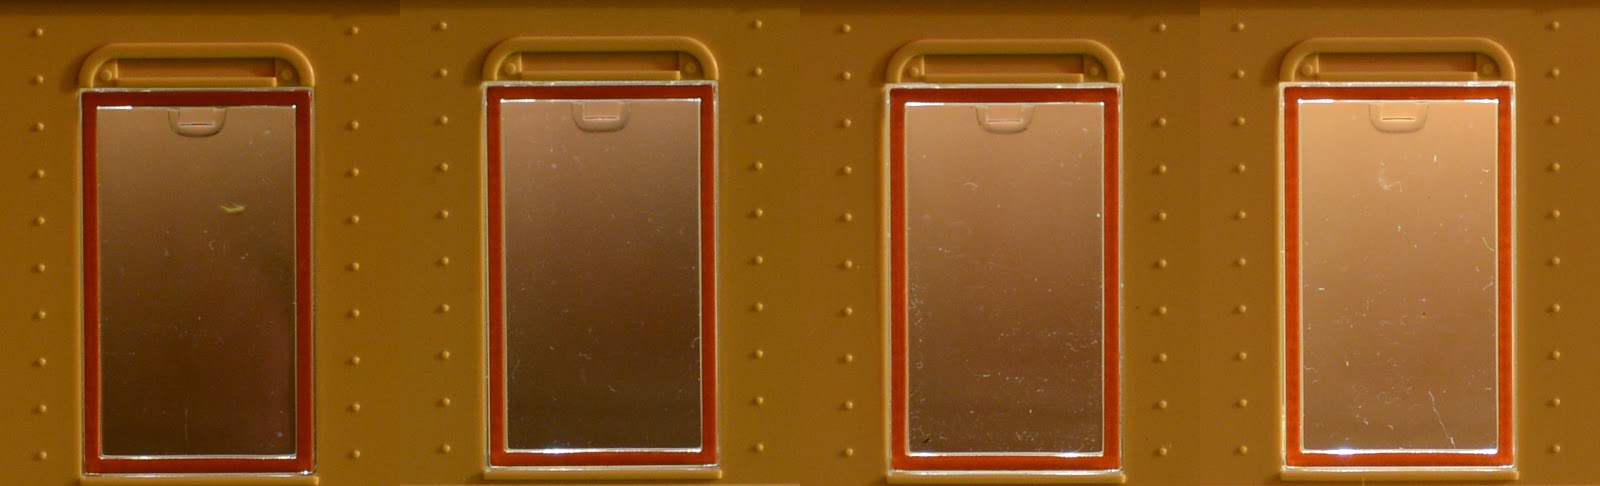
I was not sure what the correct value for my LED-current-limiting resistor would be and I decided to experiment. I equipped each of the kits with a different resistor and compared the results. Here are the photos of my cars, taken at the very same camera settings using different resistor values:


These photos do not really look that different. The change is actually much more visible in real life. But still - if you compare 1kOhm version with the 4.7kOhm one, the difference is obvious.


With the 4.7kOhm resistor, the car is just slightly lit on the inside. And with the 1kOhm version not only the inside is well lit, but the LEDs illuminate the outside of the car a little, too.

And of course the difference is perfectly visible if you compare just the sections of the original photos.


Personally I like the brightest version best. It just looks nice. There are two reasons however why I did not go for it:
  • While my personal opinion is that it looked nice, it did not look realistic any more. Realism is not my priority but... I hesitated to make my cars that bright.
  • With a decrease in the resistor value comes the decrease of the positive effect that the flicker-free capacitor gives. And with only 1kOhm the light was fading out much, much quicker when the power was cut.
In the end I decided to use 2kOhm resistor for all my cars. It seemed like a good compromise. Here's the end result:


The point of the exercise? It pays off to make something yourself. You have then a full freedom of customizing it and you can get a result that you're really happy with!

Sunday, 12 July 2015

Making my own backdrop

My second N scale layout is a temporary one so I placed it in an area that used to be a kitchen. I did not make any changes to this space, so it still has some of the kitchen facilities. That's fine except for the fact that I'd prefer to watch my trains in a more realistic setting. And instead of kitchen tiles in the background, I'd rather see some trees and the sky. Seems like I need a nice backdrop.

I could have just bought a backdrop BUT:
  • I had a problem finding one that would be long enough (I needed almost 4m/13ft)
  • for my temporary layout I needed a free standing backdrop, so I would need to glue it to something anyway
  • they cost money... :)

And I decided to build my own. I started searching for a panoramic photo and this one caught my attention:


It's green at the bottom and blue at the top. That's what I needed. And it's available on Wikipedia (meaning: free) so it's OK to use it. The full resolution picture can be found here.

Now, how do I print it on a 4m long piece of paper? I checked the possibility of printing it at a professional studio and it's definitely doable. However:
  • the cost would be almost as buying a pre-made backdrop
  • it would still not get printed on anything that could act as a free standing backdrop

So again - let's improvise...

Using a PosteRazor software I divided the picture into 13 pages. I also set it to include a 1cm overlap for easier gluing together. I have to say that PosteRazor is really user-friendly and it all took me literally 5 minutes.


I've printed my pictures on 13 regular A3 pages. This is what they looked like after printing and cutting the top and the bottom margins.


Of course the regular printer paper is very flimsy. So I also bought A3 cards (stiff paper) to act as a base for my backdrop. And a lot of glue of course, since I was going for an area of over 1m2.

I started gluing the printouts to the card base. It was not difficult at all and I wasn't even very careful with the glue assuming it would become transparent after drying.

Three pages already connected:


The base cards I bought came in A3 sized pages. So of course they needed to be connected in order to form the full panorama. I decided not to rely on gluing them together only with the printouts. Instead I glued some additional support at the back where edges of the cards meet. Unfortunately the photo does not show it very well, since it's all just white...


Here the backdrop is getting longer and I'm having a problem taking a nice photo in my living room...


The work is finished in the evening and the glue is dry the next morning. I need to move the backdrop to the garden in order to take a full picture. In the sunlight and from a distance it looks quite well.


Up close several defects are visible. The glue did not become transparent, the printouts wrinkled at their edges, and the print got damaged in several places where I bent the paper too much.


But it does not look bad when added to my layout..


And now instead of watching my trains like this:


I'm seeing them like that:


It turned out pretty good for a first try. There are several things I could have done better:
  • The photo could have been printed with a better quality. I used the laser printer at my office with all the quality settings and it still does not look great.
  • I should have been more careful with the glue. Or perhaps I should have used a better one. Hard to say, but I definitely have glue traces visible on my backdrop.
  • I chose to print with overlapping pages so that I don't get any gaps at the edges. Looking at the result, I have to say that perhaps the connections would have been less visible if there were no overlaps. Difficult to judge without having another go...
Was it worth doing it myself? I think so. Considering my needs, the result is fully acceptable.

Sunday, 21 June 2015

DCC voltage control

In my previous post I described a simple home-made meter that can be used for a proper measurement of the DCC voltage. There are two reasons why you may need to take that measurement:
  • your voltage may be either too high resulting in locos getting hot or not running at all (and possibly dying)
  • or your voltage may be too low resulting in locos not running at all or running slowly.
I needed the meter since one of my older N scale locomotives was running hot after conversion to DCC. The loco came in a starter set with a power supply that provided a maximum of 14V. Using my meter I was able to identify that my DCC voltage was almost 18V.

I'm not really sure whether the locomotive was in any kind of danger. But it was getting hot and that worried me. So I decided to solve that potential risk. And how could I lower the DCC voltage on my layout?

The simplest way to lower the voltage is to insert a resistor into the circuit. That however does not work well in our case. The voltage drop on a resistor depends on the electrical current and that changes all the time when running the locomotives. In this case the more locomotives would run, the lower the voltage on the track would become.

We need a constant voltage drop instead. And the solution is in using diodes which do exactly that, independent of the electrical current. The diodes however pass the current in one direction only and therefore we always need to use a pair to ensure the full DCC signal. The circuit diagram looks as follows:

So we basically attach some diodes in series on one of the wires connecting our command station to the layout track. Each diode generates around 0.6-0.7V drop and any number can be used depending on the need. Of course the number has to be the same in both directions.

I've decided to lower the voltage to around 15V and that resulted in 4 diodes in each direction. Using my poor soldering skills I created this device which works perfectly:


What kind of diodes do you need for this? Any rectifier diode will work but you should consider two aspects:
  • The diode should be 'fast'. The DCC signal is not really high frequency, so it should not matter that much, but it's your choice and the difference in price is very small, so always go for 'fast' diodes.
  • The diode's maximum current must be more than what you plan for your layout. My diodes are rated 6A and that's way more than I'll ever need with my N scale trains.
Of course I know that some modern DCC systems allow us to change the track voltage. Even the Z21 I use can do that. But I'm using my command station for two different scales and it's easy to forget to change the setting when going back from my garden layout to my N scale layout. And that's why I prefer to have a hardware solution which ensures that I don't kill my decoders when I make a stupid mistake.

And here's the reason behind my DCC voltage experiments - the very "hot" locomotive:

Friday, 12 June 2015

DCC voltage measurement

DCC is - to a large extent - a plug'n'play system. You simply assign an address to a locomotive and you're ready to go. And the equipment from different manufacturers is compatible, so usually there's nothing to worry about.

There are however situations when something does not work as expected. In the small N-scale it might a locomotive getting very hot when running at full speed. In the large G-scale it could be a locomotive not running at all in some parts of the garden layout.

That's when you want to know what's happening on your track and the first thing you'll want to investigate is the track voltage. Measuring it properly is not trivial. The DCC signal is an irregular square wave and no popular meter can handle that out of the box.

The best solution would be to use an oscilloscope but those are neither cheap nor portable. This might change soon looking at what is becoming available at JYE Tech. But that's a topic for another post...

There are also solutions dedicated to measuring DCC voltage like the RRampMeter from DCC Specialties. But those are not cheap either, and that's why I decided to build something on my own.

So here it is - my own DCC voltage meter:


OK, I know. It looks like a failed school project but I can assure you: it does work just fine.

So how do you make your own? The detailed instructions can be found here: http://www.wiringfordcc.com/track.htm#a4 but I'll try to summarize them below.

All you need is a very simple electrical circuit that will rectify and filter the square wave. It's really just a few components:
So what you need is:
  • The rectifier bridge (the four diodes) - I'm using an integrated circuit here, it's cheap and small.
  • A capacitor to filter the rectified signal - any will do as long as it is rated above the voltage you're going to measure. Mine is 35V.
    And you might not want to go too high with the capacity, as the more you use, the stronger switch-on surge you'll cause. 1uF should be enough.
  • A DC voltmeter - I'm using a component bought on Ebay for around 2-3 Eur

  • Some cabling - my choice is a wire with the "crocodile" clips but it's not the best choice in case you want to have the meter connected permanently to your layout
  • A housing - I've used a beautifully transparent Apple mouse box
In my case all those components ended up soldered to a universal PCB and then hot glued to the housing. Works like a charm.

An important thing to remember is that such a meter does not really measure its input voltage. It measures the voltage after the bridge rectifier. You should expect that to be lower by 1.3-1.5V compared to the track voltage.

So what you should do is check what the difference is in your case. This can be done by measuring a DC source and comparing your result to a result coming from another "reference" meter. Then you always need to remember to take that offset into account when performing your measurements on the real track.

Total cost: below 5 Eur.
Satisfaction: immeasurable :)

    Sunday, 12 April 2015

    My own interior lighting for coaches - electrical aspect

    I remember very well that the moment I bought my first N-scale coach, I immediately thought: I have to have some light inside it. I've been trying to get that since then, applying several different solutions. Surprisingly I got to a satisfactory result just recently.

    My first attempt was of course to buy and use a ready-to-install lighting kits from my coaches' manufacturers. I tried that for two coaches and was not really impressed with the outcome:
    • the kits did not provide a nice lighting effect - they were just a light bulb with a light diffuser so the brightness was not constant throughout the entire car's length
    • the cars from different manufacturers could not be used together, since the colour of the light and its brightness were completely different in each of the kits
    • the kits were flickering a lot, unless the track was completely clean
    • the price...
    And then I started working on my own solution. There were several goals I wanted to achieve. My own lighting kit had to:
    • be DC and DCC compatible
    • be safe for the cars (no heat)
    • be safe for the power supply (low power usage)
    • work regardless of the tracks polarity
    • be flicker-free
    • use as little electrical components as possible (so that it could fit into the N-scale coaches)
    The scary thing is that I'm an electronic engineer by profession and it still took me several tries to create a kit I was happy with. The very first attempts were promising as can be seen in this video:


    but it was still a long way before I was happy with the outcome. Let's skip however all the failed attempts here and just show the final (for now) electrical circuit:

    My lighting solution works on LEDs. This way:
    • it produces no heat
    • it uses very little power
    • I have the freedom to space the LEDs the way I want and have the brightness I need (both in terms of intensity and distribution)
    • I have the freedom to choose the colour of the light, since LEDs are available as both "warm" and "cold"
    Other than the LEDs, there are just four electrical components:
    • Bridge - ensures correct polarity on the LEDs and makes the solution compatible with any DC or DCC layout
    • C1 - keeps a little bit of electrical charge to allow flicker-free operation. The bigger the better. I'm getting good results starting at 100uF.
    • R1 - lowers the electrical current during start-up when the capacitor is completely discharged. I had no problem running my coaches without R1 but better safe than sorry. Especially considering my growing collection of cars.
    • R2 - lowers the current flowing through the LEDs and ensures a proper level of brightness. I'm using 4.7kOhm currently but it's slightly too bright for the N-scale. I might be using a higher rated resistor in the future.
    All those components are available in very small packages so it all fits into an N-scale coach. The capacitor was the biggest challenge and the solution was using a tantalum SMD one. But how exactly I fit that into my cars is a topic for another story...