Recent Posts

Tuesday, 3 November 2015

First look at G-Scale rail clamps

I did not have the need to use rail clamps on my garden layout, yet. It's not really surprising since I've just started my adventure with G-Scale, and everything I have is brand new. I know however that sooner or later I'm going to need them...

So I decided to go ahead and try them already now. I've bought products from Split Jaw, PIKO and Uncle Herm's for that purpose. But I won't be reviewing or testing them here. It will all be just my first impressions...


One thing that has been brought up recently is that some of the rail clamps break when too much force is applied. It's very tempting for me to perform a test and have some conclusions documented on my blog. I could even live with the financial loss that such test requires but I won't do that. There are two reasons for that:

Reason one: the test would require to break a clamp from every manufacturer while the applied force is being precisely measured. I do not have an equipment to do that...

Reason two: let's take a look at the Split Jaw rail clamp installation note:


It says explicitly not to use too much force. So it seems the manufacturers know that these things may break and they warn us about it. Does proving that a manual is right make sense at all?

So instead I will be applying a reasonable force when working with rail clamps. I will always tighten them up to the point where I'm not able to pull the rails apart anymore. That's their function, isn't it? And as soon as any of them breaks (today, tomorrow or in a year) I will report it here.

OK, let's take a look at the rail clamps.

Uncle Herm's Code 332 Rail Joiners


I've bought a pack of 10 of those on Ebay. They were priced at $18.49 which gives $1.85 per piece. Shipping within US was free and I was able to use that option (courtesy of a friend of mine). What came in an envelope is a small plastic bag with clamps and a screwing tool.


At first I was not sure what to think. Was the tool part of the set? Was it a free gift? Why do the clamps come in a regular plastic bag with just a sticker? Why wasn't it all packaged like a real product?

But let's move on. There are no surprises after unboxing. It's still just the clamps and the tool. No manual at all and no spare parts.


Inclusion of the tool is a big plus. You don't need to search for one in your toolbox, it's just there for you. The tool is pretty thin but feels sturdy. It does not bend and seems it could be easily used to apply more force than is really needed.

Here's a close up look at the clamp. It is built from two brass pieces connected with two screws. The profile seems rather low and the screws are medium sized. It feels like a solid piece of metal when held in a hand.


The installation was rather tricky. When unscrewed, the clamp won't stay on the rail. It means it has to be held with one hand while the screws are being tightened with another. Unless of course you get some help from a friend or use an extra tool to hold it. But it's definitely not easy...

But it looks very nice when installed and it holds the rails very well. I have to say that even though my first impression was a mixed one, the Uncle Herm's clamp feels like a quality piece and gets the job done well.

Uncle Herm's clamp on PIKO R3 track

PIKO 35293


I purchased this 10-pack online and I used a US-based store again. It was priced at $16.79 which means $1.68 per piece. What arrived looks like a typical PIKO product and makes a good first impression.


Unboxing reveals a manual (one without any "excessive force warning"), a tool, clamps and two extra screws. The inclusion of spare parts is nice although one may wonder why the manufacturer decided to do that.


The only reason I'm questioning it is because the screws are really tiny. And the tool is very thin and a little bendy, too. I can imagine that those small parts might be easy to lose or break. But I'm really just hypothesizing now...

What comes with those tiny screws is a really nice look. PIKO clamp makes an impression of a well designed product. It's not the most important thing in case of a rail clamp but the German tidiness is definitely there.

The clamp has a rather high profile. This probably makes it harder to hide but definitely easier to install. I have to assume that such higher profile is still compatible with all the rolling stock around the world but I don't really know that.

The element is built from two brass pieces connected with screws. It feels a little lighter than the other clamps but I weighted it and it's not lighter at all. So it must be the soft shape...


The installation of PIKO joiner is reaaaaally easy. And it's all because the clamp simply stays on the rail once you put it there. So it does not need to be supported when being tightened. This is really cool and the installation experience is definitely the best of all three products.

And of course it holds the rails very well. Just as expected.

PIKO rail clamp on PIKO R3 track

Split Jaw 40105


The last one I bought is a very popular (at least in the US) Split Jaw brand. The pack of 10 cost me $19.99 which is of course $2.00 per piece. It is therefore the most expensive one and I expect it to be the best one, too :)


Unboxing and a surprise - no screwing tool there. Just the clamps. No manual except for a small note at the back of the bag.


The clamps feel heavy and solid - similar to Uncle Herm's. The profile is low but the screws are noticeably larger. They don't look that nice in my opinion but perhaps their size guarantees better operation. If that's the case - I'm fine with a worse look.

An interesting thing is that the clamp looks like it's made from a single brass piece. And I started wondering how this was going to work...


The mystery is revealed once the screws are loosened. It's actually three brass pieces. So the design is completely different than the two other products.


The biggest challenge for me was the lack of the tool. I thought I had every type of screwdriver in my possession already but this clamp proved me wrong. None of my tools fitted it. Must be some American standard. I really wish Split Jaw took care of that like the other manufacturers did.

Once you have the tool the installation is easy. Not as easy as PIKO but easier than Uncle Herm's. The thing is: the clamp does not stay on the rail when unscrewed and it has to be held. BUT since it consists of three metal pieces you can do it rail by rail. So the clamp can be first attached to one rail end and tightened. And then connection to the other rail end is very easy, since the element is now stable.

Split Jaw therefore manages to keep the low profile while making the installation acceptably easy. That's very cool. And I'm impressed.

The screws are of course still ugly but the rails are kept together well.

Split Jaw clamp on PIKO R3 track

Summary


The three different rail clamps are really three different products. There are differences in all areas:
  • the price (small difference but might pile up if you buy 500 pieces)
  • the look (both: the height of the profile and the finishing)
  • the installation (from very easy to a procedure requiring a third hand)
But in the end they all seem to hold the rails equally well and I'm not able to tell which one I will choose for my layout.

I really like the Split Jaw except for the ugly screws and the lack of the tool. PIKO seems nicely designed but I keep wondering about the very thin and tiny elements. Uncle Herm's is low profile and looks good but the installation is rather difficult.

None of the clamps broke during my first experience :)
And here are some photos to prove that!

From left: Split Jaw, Uncle Herm's, PIKO

From top: Split Jaw, Uncle Herm's, PIKO

From left: Split Jaw, Uncle Herm's, PIKO

Saturday, 31 October 2015

Garden works, part 8: Elevated layout frame

Another month has passed and I've managed to achieve some significant progress with regard to my elevated garden layout. My last update covered building the drainage/foundation for the future structure. It also mentioned the challenge of removing all the dirt that was left from the digging I had to do...

Well, I'm happy to report that 2 full days and 5 afternoons later, the dirt is no more! I transported it all with a wheelbarrow to a container and it was taken away by a truck.


Right after that I bought all the wood that was needed for the missing layout frame modules. And it was of course immediately painted with a wood protector.


Once dry, the work on building the next set of walls has started. One challenge I had here was that the planks I bought were rarely really straight. I had to use a set of transport belts to force them into the correct position.


When the module walls were ready, they were painted the second time.


The next part was surprisingly easy. The wooden walls were connected using cross planks and immediately became my layout modules. They're not perfectly rectangular, but they fit pretty well. And it all actually looks pretty good, too (especially from a distance).


The trickiest part of the frame was the "soft corner". I really regret coming up with this idea. It took me over half a day to build and it was the moment when my lack of experience in working with wood really showed. The result is far from perfect but it feels sturdy and will have to do...


I also took an extra care about the modules' connections. Each module is supposed to be independent and be able to hold the filling by itself. But I really wanted to make sure that they don't shift and that the entire frame stays as one. Hence the extra support at the points of contact:


The remaining elements were installed and painted. The entire frame for my elevated layout is now ready. It's waiting for the stones to be filled with.


Unfortunately the days are becoming shorter and colder. The weather is often rainy, too. There's no way I can finish this project before winter. I guess I'll have to cover the structure for now to protect it and restart my activities in spring. So that might be the last update on my elevated layout this year...

Saturday, 17 October 2015

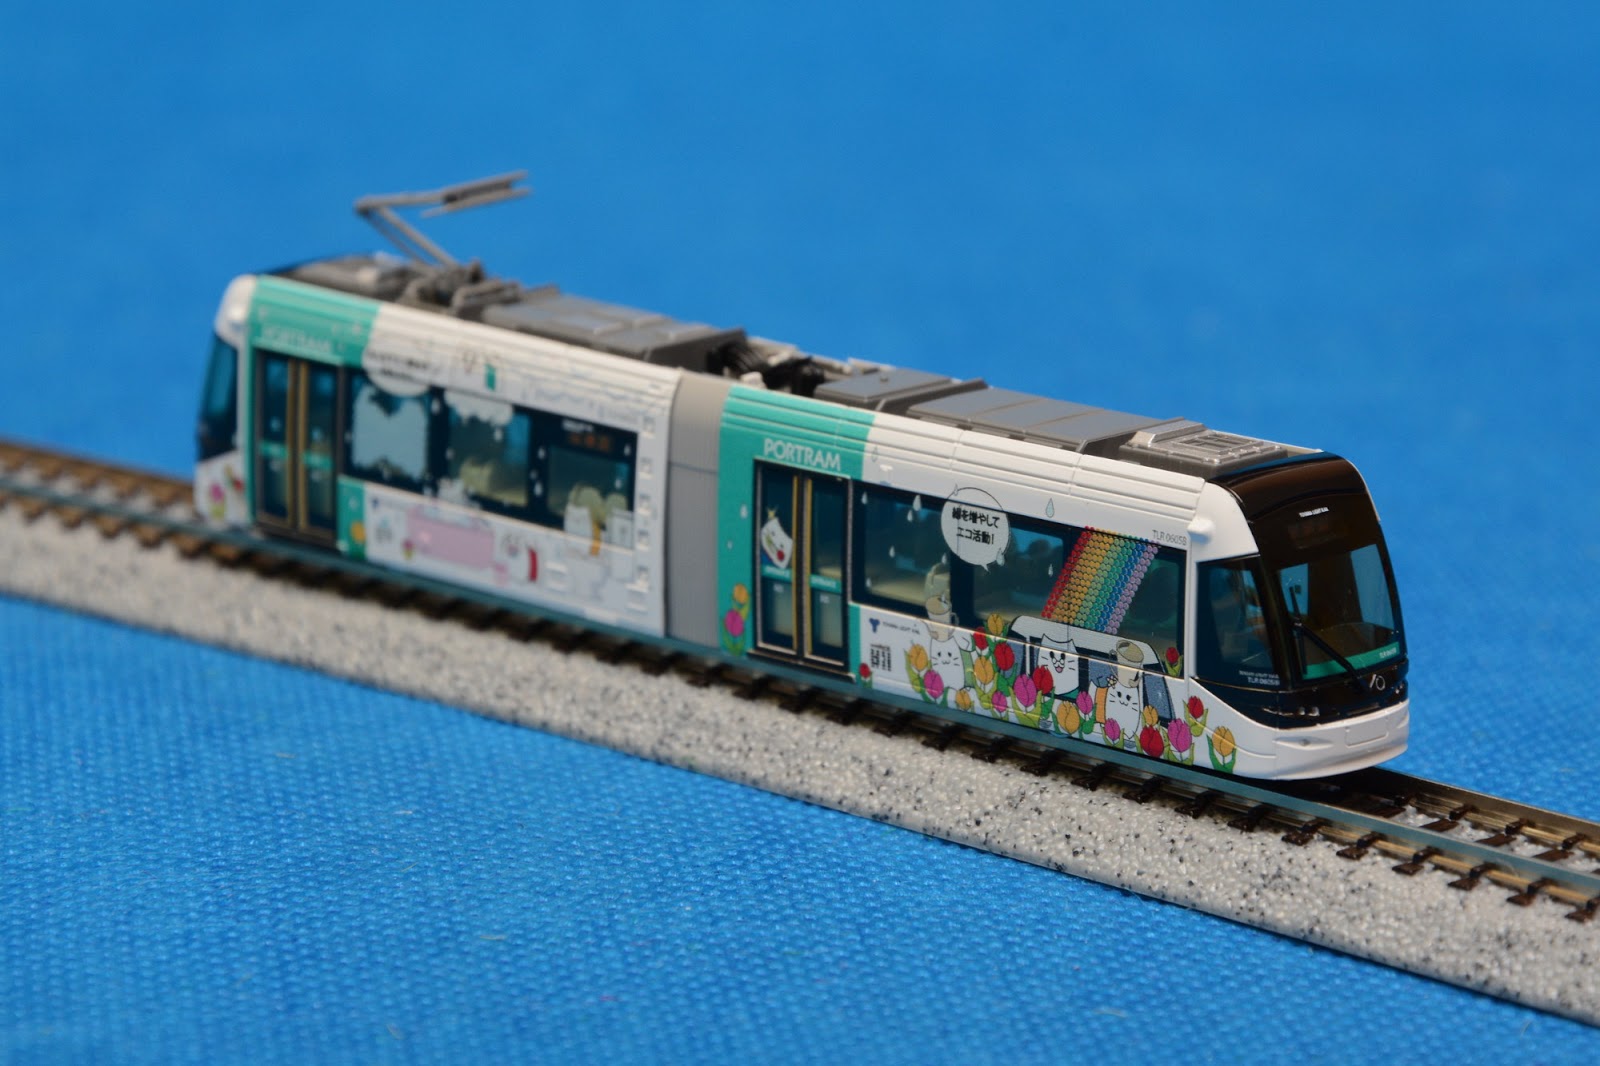
Kato Portram 14-801-8, N-Scale TLR0605 Tram

And so it happened. I've bought my first Kato engine. I've been hesitating to do it for a very long time due to my love to DCC and Kato's lack of REAL support for this technology. But I needed something small, and nice, and not necessarily DCC to be permanently placed on my tiny layout. That's how the idea of buying a Kato tram came to life...

The unit I've bought is Kato 14-801-8 and it's an N-Scale model of a TLR0605 Japanese streetcar. I've purchased it from Plaza Japan on Ebay and it cost me $71 plus shipping. The unit comes in a typical transparent plastic box:


After opening it and removing the bubble wrap layer, the tram is fully visible. The model I bought has an interesting painting scheme. It's colourful and very Japanese-looking. The choice I've made will certainly be appreciated by my little daughters.


There isn't much to be found in the box. Here's the full content:


The manual is exclusively in Japanese. I can't read it at all and I hope I did not miss anything important. Two things however are worth mentioning:

The manual explains in pictures the process of opening the unit. This will be useful as I'm planning to install some people figures inside the car.


Judging from the pictures, it seems spare parts are available. No need for that, yet, but who knows what happens in the future...


Here's the tram in its full glory. Photos from almost every possible angle:


The tram looks fantastic. It has plenty of details and it's very nicely painted. The body is all plastic and it does not feel very heavy. This could imply low quality materials but the unit does not feel that way. It feels just right - neither fragile, nor very sturdy.

The wheels of the engine are very small. Smaller than anything I encountered in the N-Scale so far. I'd expect the model to be more prone to derailing because of that.
And that's correct - it ran off the track almost immediately, as my test layout had a small bump between the adjacent track pieces. I had to correct the connection between the rails to allow the unit to pass it properly.


Another interesting element is the pantograph. It's made of plastic and you open it by simply pulling it up. There's no mechanism there to hold it or support it. It looks great but it also looks very fragile. No wonder it's available as a spare part.


A very nice thing about the unit is the factory installed lighting. The tram has double white front lights and a single red back light. And yes, they work in both directions.

On top of that, it also features interior lighting, so the inside of the car is nicely lit, too. That's one of the reason I picked up this model and I have to say it was worth it. Looks great!

Unfortunately the lighting is constructed as in a usual DC model. So its intensity strongly depends on the track voltage and to get the full experience the tram has go fast.

Here are some photos showing the car under full power in a dark setting:


Enough pictures. It's time to see how it runs. In my opinion it's a little loud but other than that it operates perfectly. Here's a video showing it on my test track:


So how do I like the model?

I like it a lot. It runs nicely and looks great when illuminated. It would fit a modern city layout perfectly. Money well spent.

Pros:
  • great looking
  • nicely painted 
  • well detailed
  • runs smoothly
  • interior lighting
  • reasonable price
Cons:
  • not DCC/sound friendly
  • light intensity depends on track voltage
  • small wheels
  • fragile pantograph

Tuesday, 29 September 2015

Garden works, part 7: Elevated layout foundation

September is almost over. I have been very much focused on elevating my garden layout in the past few weeks. The work has been going slowly but the results are already well visible. This is what it looks like now:


As you can see I already have the foundation for my elevated layout: a large ditch filled with drainage stones and the first part of my layout frame. Starts looking nice :)

But let's take a look back and see how I got here...

The original idea (described here) was about building a modular wooden frame that would later be filled with dirt. This is what my design looked like:


Based on that plan I've built the first wooden module. As you can see I've decided to add some more cross-support. I was simply afraid the entire thing was not going to hold the pressure of the filling. More wood of course meant higher cost :(


The module was painted with a wood protector. And it was painted twice to get the colour requested by my wife. Painting more wood twice = higher cost :(


In the meantime I was preparing the place where the module would be later installed. This was going to be exactly in that corner of my garden.


I did not want the wood to rot too quickly, so I had to provide some drainage. I've decided to dig a large hole and fill it with stones. This is the same corner after four days of digging:


In the meantime I ordered the first batch of stones. And that's where another improvement comes into play. I was afraid that filling the frame with dirt would create a very moist environment that would quickly damage the wood. So I decided not to use the dirt at all. I'm going to be filling my frame with stones only. This of course increases the cost, too.

And that is what six tons of stones look like. I do not have a road access to my garden so I had to move it all with a wheelbarrow. It took six days...


Three weeks later the entire ditch was ready. It's around 25 m2 (~270 ft2) large and 25 cm (almost a foot) deep. The effort needed to dig it was huge. I've never ever done anything like this in my life before. It was so painful, it made me think about giving up more than once...


A side result of all this digging is a huge pile of dirt in my garden. Actually most of my garden is just one big mess now.


And removing all that dirt will again require using a wheelbarrow. I've ordered a debris container and I'm moving all the excess soil out of my garden. I'll need at least a week to finish that...


The effort is huge. It's a hard physical work I'm not really used to. The cost is also going up. But the entire project is starting to look good. And I'm thinking the worst part might be already behind me.

Will I finish it before the winter hits? Hard to say... For now I just wish I was a little less tired, so I could enjoy it a little bit more :)

Tuesday, 15 September 2015

Interior lighting tuning

In one of my previous posts I have described my method of adding interior lighting to a G scale passenger car. And since I own more than one, I wanted to equip all of them with lighting kits. So I went ahead and created three more.


Nothing new here of course. Maybe except for the fact, that those kits definitely turn out better and better with each piece I make. Perhaps one day I should be selling them?

But let's get back to the topic. One thing I did not like that much in the kit I made for my first car was that the light was not bright enough. I've used there a 4.7kOhm resistor, exactly the same that I use in N scale. Seems it was just too much for a G scale model and I decided to do something about it.

I was not sure what the correct value for my LED-current-limiting resistor would be and I decided to experiment. I equipped each of the kits with a different resistor and compared the results. Here are the photos of my cars, taken at the very same camera settings using different resistor values:


These photos do not really look that different. The change is actually much more visible in real life. But still - if you compare 1kOhm version with the 4.7kOhm one, the difference is obvious.


With the 4.7kOhm resistor, the car is just slightly lit on the inside. And with the 1kOhm version not only the inside is well lit, but the LEDs illuminate the outside of the car a little, too.

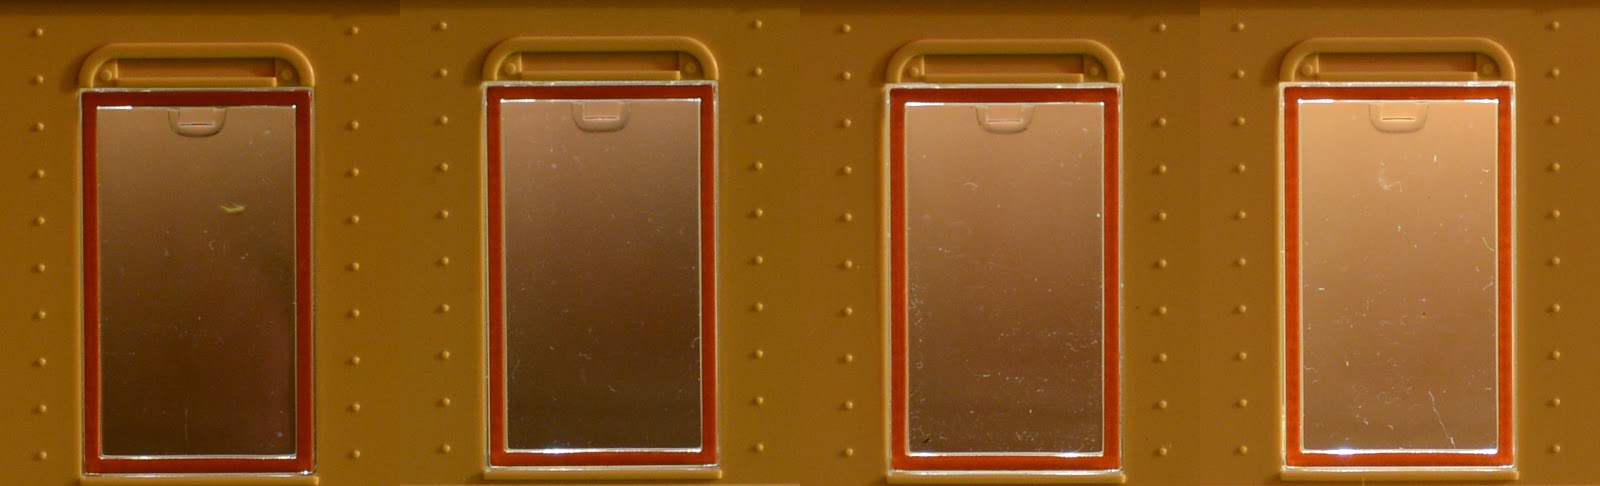
And of course the difference is perfectly visible if you compare just the sections of the original photos.


Personally I like the brightest version best. It just looks nice. There are two reasons however why I did not go for it:
  • While my personal opinion is that it looked nice, it did not look realistic any more. Realism is not my priority but... I hesitated to make my cars that bright.
  • With a decrease in the resistor value comes the decrease of the positive effect that the flicker-free capacitor gives. And with only 1kOhm the light was fading out much, much quicker when the power was cut.
In the end I decided to use 2kOhm resistor for all my cars. It seemed like a good compromise. Here's the end result:


The point of the exercise? It pays off to make something yourself. You have then a full freedom of customizing it and you can get a result that you're really happy with!