Recent Posts

Friday, 8 July 2016

Pola G 330980, G-Scale "Oberndorf" train station

Pola G 330980 is a very small railway station model I was given for my wedding anniversary. Its official price on Faller website shows as 87,99 Eur but I'm pretty sure my wife managed to grab it a little cheaper. I do not know the details though, since it was a gift :)

The station is really small but since it's a G-scale product, the package is still much bigger than most of the items you'd find at a train models store. It's quite heavy and measures 40 by 30 cm.


The description on the box says it's partially hand painted, weather resistant and featuring opening doors. Let's open it!


Inside the big box, there's a smaller one...


...containing the more fragile parts. Glue however is nowhere to be found.


The most delicate elements are additionally wrapped in a protective paper. I have to say it's impressive how extensive the packaging is overall.


And here are all the parts together. I can say at first sight that some extra pieces are included. Four doors are clearly visible while the building needs only two.


The manual is just one page. It's understandable taking into account model's low complexity. What I'm missing however are parts numbers. My previous PIKO station had all the parts numbered which left nothing to the builder's decision. This is not the case here, but it's OK considering how easy to build the station is.


There are a lot of stickers included along with a white plastic base. Of course nothing is in Polish, so I'll be again making my own decorations.


Build step one - the walls. Very easy to do, everything fits perfectly. Three things to note:
  • the walls are made of a really solid plastic, one could even mistake the material for something else (something better)
  • the transparent parts used for window glass are not "flimsy ones" - like in some other models - but a real thick plastic
  • no curtains imitations are provided


Step two - connect the large parts together. Again - the walls fit perfectly into the base, and the roof lies nicely on the walls. One thing that caught my attention are the door frames. They feature bumpers which prohibit the doors from opening to the inside. That's pretty cool and PIKO should really copy that idea.


Step three - installing the details. With just a few more parts glued, the building is ready.


But the sticker decorations are still missing. I have previously printed my own labels on regular paper, glued them to the model and protected with weather-proof transparent lacquer.

This time I'm trying something else. I'm printing my decorations directly on label sheets which are declared "durable" and for "outdoor use".


Here they are applied on the plastic base.


This is what the final result looks like. All the model parts and all custom stickers installed. Looks very nice to me :)


And it makes an even better impression when lighted and installed outdoors!


Summary

It's a very small train station and it's very quick and easy to build. Everything fits perfectly and working with the set is a pure pleasure. The plastic material used seems very sturdy, especially when it comes to the wall parts. Those are also nicely painted which helps to create an image of a neglected rural building. I like the model a lot and will definitely make it an exposed element of my layout.

Wednesday, 29 June 2016

G-Scale cars outdoor conditions test - start!

I've bought some G-scale sized (more or less) cars last year with an idea of putting them on my garden layout. Without much effort my collection grew beyond of what I needed for a start. Currently it consists of six cars.


None of those cars is a cheap toy and all of them were priced at 10 Euro or more. Most of them are die-cast metal with plastic parts and they feel pretty solid. However only one of them is declared weather-proof, so there's no way to know how they will do outdoors.

Today those cars are in pretty much perfect condition... But since I've managed to build my first piece of a G-scale road, it's time to take them outside...

Hyundai i30, Welly
VW Beetle, Kinsmart
VW Bus, Kinsmart
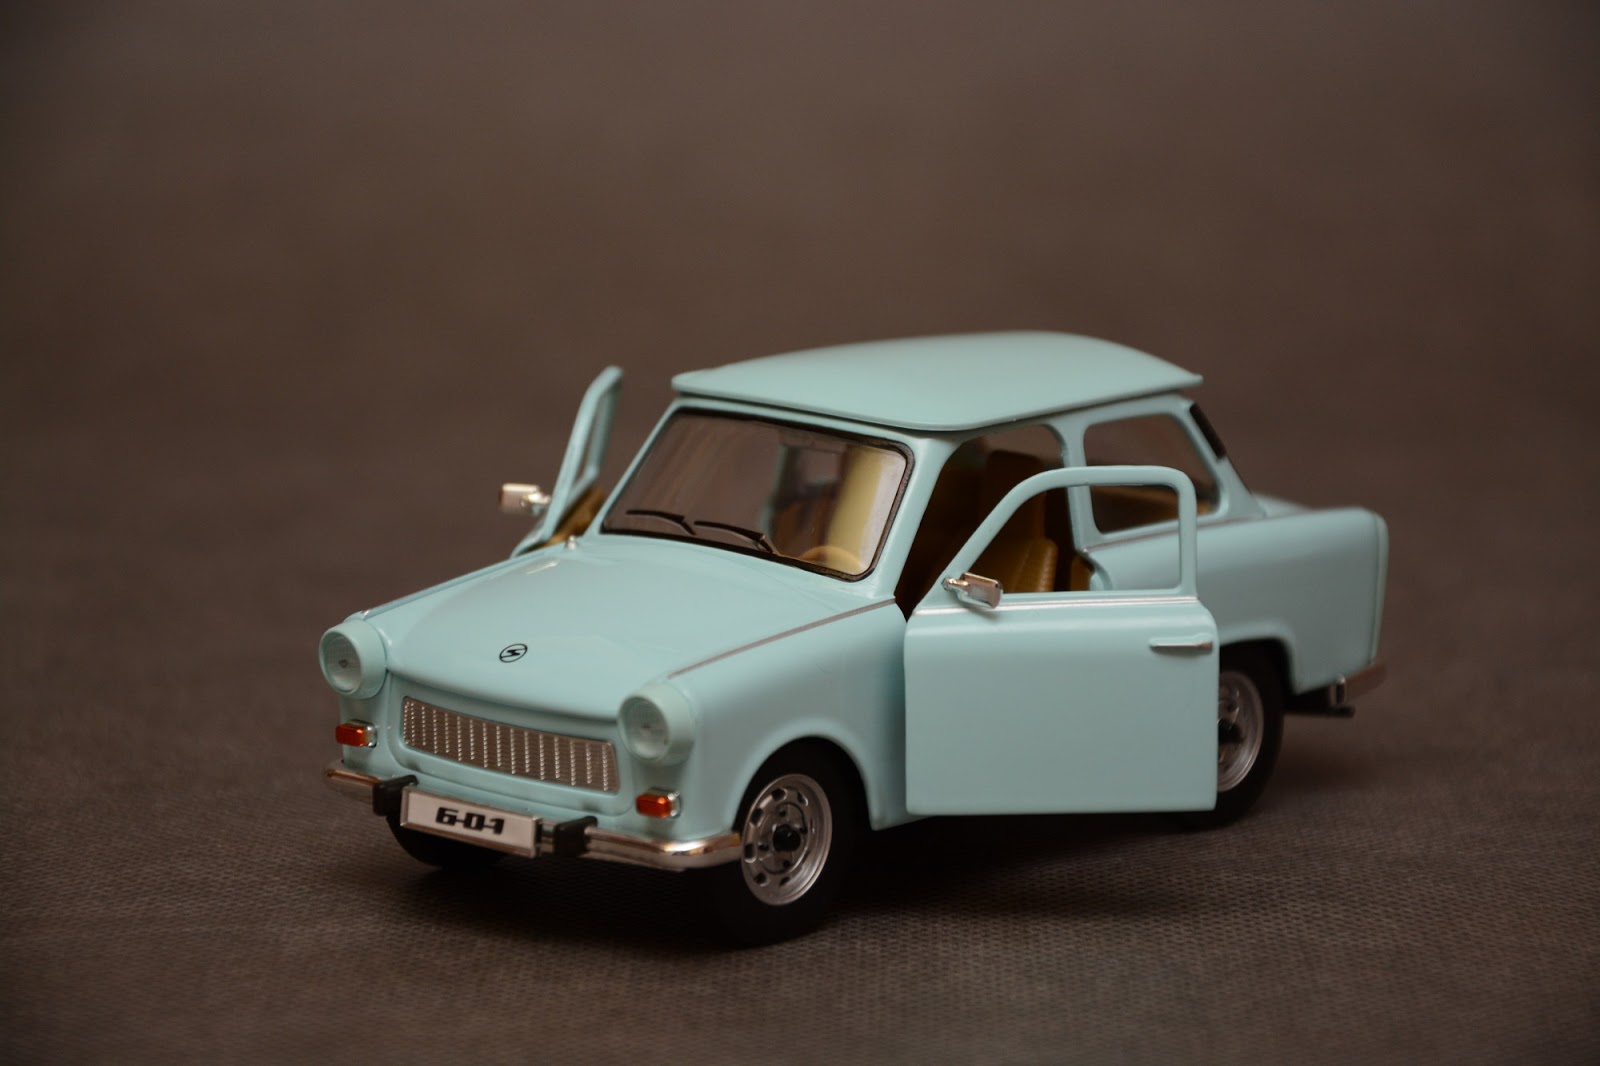
Trabant 601, Yat Ming
Alfa Romeo MiTo, Bburago
Opel Blitz, Pola G
So let me treat them with sun and rain and wind and see how they'll do. Today is the beginning of their outdoor test and in 100 days I'm going to check on them. Let's see which ones turn out capable of being a part of an outdoor layout...

...and as soon as I took them outside it started raining pretty heavily. I guess the test is on then. Good luck, my cars!

Wednesday, 22 June 2016

LGB 10310, G-Scale lighted track bumper

Both PIKO and LGB offer a selection of track bumpers in case you want to build a sidetrack. There are a few models to choose from but I could find only one that offered an extra feature - a lighted sign. And since I care a lot about how my layout looks like at dusk, I've decided to purchase exactly this one.

The element is LGB 10310 and it is priced at around 15 Eur. The ArsTecnica store had a slightly better offer and that's where I made my purchase. The model comes in a rather small cardboard box.


The package consists of two items. We get the bumper itself and a plastic bag containing the lighted sign set. No track is included.


The lighted sign comes unassembled. Three plastic parts have to be put together and inserted on top of the light source. Interestingly a regular light bulb is used here. I really expected an LED but I guess the design of the model is already some years old and hence the "20th century solution".


Here's what the assembled model looks like. I have to say it really makes a good overall impression. The plastic material LGB used seems very rigid. I'd be surprised if it didn't last outdoors.


The bumper needs to be inserted on top of a track piece. It fits perfectly on straight LGB brass rails.


Four latches keep it firmly in place.


Here is the final outcome with the light off...


...and with the light on. I'm using 16V DC source even though the manual suggests AC voltage.


I've installed the bumper on an LGB track just for the photos. And my layout uses mostly PIKO track. This forced me to remove it from the LGB piece...

Taking the bumper off was not that easy. And once I succeeded, I've decided not to have to do it ever again. Hence the solution with a very short straight piece. This way the bumper can be attached at any place in the layout without any effort.


Two more photos taken outdoors. During the day...


...and at dusk.


Opinion? Looks really nice and very, very solid. I'm happy with my purchase.

Sunday, 12 June 2016

How to get "warm white" garden solar lamps

Garden solar lamps are available in many sizes and shapes. It so happens, that the cheapest of them look more-or-less like G-scale sized street lamps. They're not really that beautiful but considering their price it would be a sin not to use them on your layout... At least until you can afford something better...


So they're less than $1 per piece and they work pretty well. Unfortunately I could not find them in "warm white" flavour. At first I thought I was fine with "cold white" but once I saw them on the layout I couldn't stand the colour and I knew I had to do something about this.


So let's try to turn the "cold" solar lamps into "warm" ones...

Opening the housing reveals a very simple electrical circuit. The LED we want to exchange is clearly visible. It almost feels like it's meant to be replaced.


Unsoldering the element takes 5 seconds. No special equipment or skills are required.


The "warm" LEDs can be ordered on Ebay or anywhere else. I got a bag of 100 of those for less than $3 with free international shipping from China.


Soldering the new LED takes another 5 seconds. Again - no special skills required, just remember that the polarity matters (test before soldering).


And voilĂ  - the first upgraded solar lamp with "warm white" light is ready. Only four more to go and I can start working on the platform for my train station :)


Sunday, 5 June 2016

Garden works, part 10: Yes, it's again about stones...

...but I promise it's the last time, really. At least for now :)

Another 12 tons of stones have been delivered to my place...


...and it again took two weeks to transport them over to my garden. But after it was done, the layout frame was almost full.


What I needed now was 5-7 tons of fine and nice rocks to create the surface. However, I also wanted to separate the layers so that the stones would not mix. Hence the usage of a strong agrotextile...


The 6 tons of fine gravel have been delivered soon later...


...and it took only four days to carry them over. Really! Transporting fine stones is so much less effort than doing the same with the large ones. The difference is unbelievably huge.


So the wooden frame is full now. Looks like a significant success and a reason to celebrate! It took a tremendous effort to deliver a total of 34 tons of stones but the result is exactly what I imagined it would be.

Now I can finally ask my crew to lay down the track!