Recent Posts

Sunday, 12 June 2016

How to get "warm white" garden solar lamps

Garden solar lamps are available in many sizes and shapes. It so happens, that the cheapest of them look more-or-less like G-scale sized street lamps. They're not really that beautiful but considering their price it would be a sin not to use them on your layout... At least until you can afford something better...


So they're less than $1 per piece and they work pretty well. Unfortunately I could not find them in "warm white" flavour. At first I thought I was fine with "cold white" but once I saw them on the layout I couldn't stand the colour and I knew I had to do something about this.


So let's try to turn the "cold" solar lamps into "warm" ones...

Opening the housing reveals a very simple electrical circuit. The LED we want to exchange is clearly visible. It almost feels like it's meant to be replaced.


Unsoldering the element takes 5 seconds. No special equipment or skills are required.


The "warm" LEDs can be ordered on Ebay or anywhere else. I got a bag of 100 of those for less than $3 with free international shipping from China.


Soldering the new LED takes another 5 seconds. Again - no special skills required, just remember that the polarity matters (test before soldering).


And voilĂ  - the first upgraded solar lamp with "warm white" light is ready. Only four more to go and I can start working on the platform for my train station :)


Sunday, 5 June 2016

Garden works, part 10: Yes, it's again about stones...

...but I promise it's the last time, really. At least for now :)

Another 12 tons of stones have been delivered to my place...


...and it again took two weeks to transport them over to my garden. But after it was done, the layout frame was almost full.


What I needed now was 5-7 tons of fine and nice rocks to create the surface. However, I also wanted to separate the layers so that the stones would not mix. Hence the usage of a strong agrotextile...


The 6 tons of fine gravel have been delivered soon later...


...and it took only four days to carry them over. Really! Transporting fine stones is so much less effort than doing the same with the large ones. The difference is unbelievably huge.


So the wooden frame is full now. Looks like a significant success and a reason to celebrate! It took a tremendous effort to deliver a total of 34 tons of stones but the result is exactly what I imagined it would be.

Now I can finally ask my crew to lay down the track!

Saturday, 21 May 2016

LGB 48681-03, G-Scale live stock car

And here's another G-Scale railcar I brought from my recent trip to the US. This time it's LGB and it's a live stock unit. Seems like my American freight train is getting longer and longer... And I still don't even have a locomotive for it...


I've ordered the car from OnlyTrains.com where I found it listed in the "Specials" section. The price was set at $50 so it was really affordable for a large scale item. Interestingly a pack of 3 similar cars was priced at $250 which didn't make any sense. So I bought just this one. Its catalogue number is 48681-03.


The car comes in an LGB branded box. The package is 51 cm long and feels sturdy on the outside. The inside however brings a surprise. There's no styrofoam at all to protect the model and instead some properly shaped cardboard pieces are used. This is fine however. The car survived an air travel in a registered luggage which definitely proves the packaging is sufficient.


The content of the box:
  • a yellow live stock G-Scale car
  • a coupler hook (since only one of the couplers has a factory installed hook)
  • a plastic brake wheel
  • a metal brake wheel mounting rod

Let's take a look at the model...


The body of the model is nicely detailed. It is supposed to imitate a wooden car and the surface of the plastic walls reflects it very well. The material LGB used seems to be however of slightly lower quality than I expected. It does feel good in hand but if you put a source of light behind the car, its plastic body does seem a little transparent. Never seen such effect before with any of my models.

Another thing I do not like that much are the black screws holding the pieces together. It's not a huge issue but they're clearly visible. I don't know why the manufacturer decided to leave them this way. Even my daughters' doll house is built with properly coloured screws.


The doors of the car open and close. And I appreciate it very much. Such simple feature allows so much freedom when re-creating a scene and makes the trains so much more interesting...


The wheels are plastic. It's not a surprise in this price range. They can be of course replaced with something better if needed. I'll leave them the way they are for now...


The brake wheel is an element we're supposed to install ourselves. I'm fine with that, however I would appreciate it very much if it was either obvious or explained how to do this. I'm really not sure whether I'm supposed to just push one element into the other or perhaps I'm supposed to use glue here...


The underframe offers some nice details. Separately applied rods and planks definitely add to the overall feeling about the car.


The painting consists of red lettering only but it's perfectly sharp and it looks very good on the yellow plastic body. All-in-all the car does look very much alive. I think weathering fans would have a lot to do here but I like it the way it is.

And now for the final test...


Moooo... The cow is slightly out of scale but still fits inside :)

Summary

The car does look very nice overall. It does miss some extra finishing (black screws) and I do have a small doubt about the quality of plastic that was used. But it was definitely a very good deal. I very much like its rich colour and I love the opening doors. And it also offers some nice details which make the model a valuable addition to my collection.

Sunday, 8 May 2016

Bachmann 93811, G-Scale Great Northern caboose

My recent visit to San Francisco allowed me to experience closing of the last real train model store in the city. It was a sad view to be honest, but a closing sale was involved, too. At 80% off I felt like I could buy all the merchandise that was still remaining. (Un)luckily I was constrained by my travelling suitcase. So I decided to just limit myself to one G-Scale car.


The caboose I picked was originally priced at $129, so with the discount I paid less than $30. The model comes from Bachmann and it's my first product of this brand in G-Scale. Its catalogue number is 93811.


The car is packaged in a box 64 x 20 x 14 cm in size. It's filled with the usual polystyrene foam. Considering the fact that it survived the air travel in the registered luggage, I can only praise the job Bachmann did protecting my new toy.


Here's the full content of the package. We basically get two items:
  • the caboose car itself
  • LGB-style couplers
Nothing more is included, which is not surprising considering the fact that all the details are factory installed.


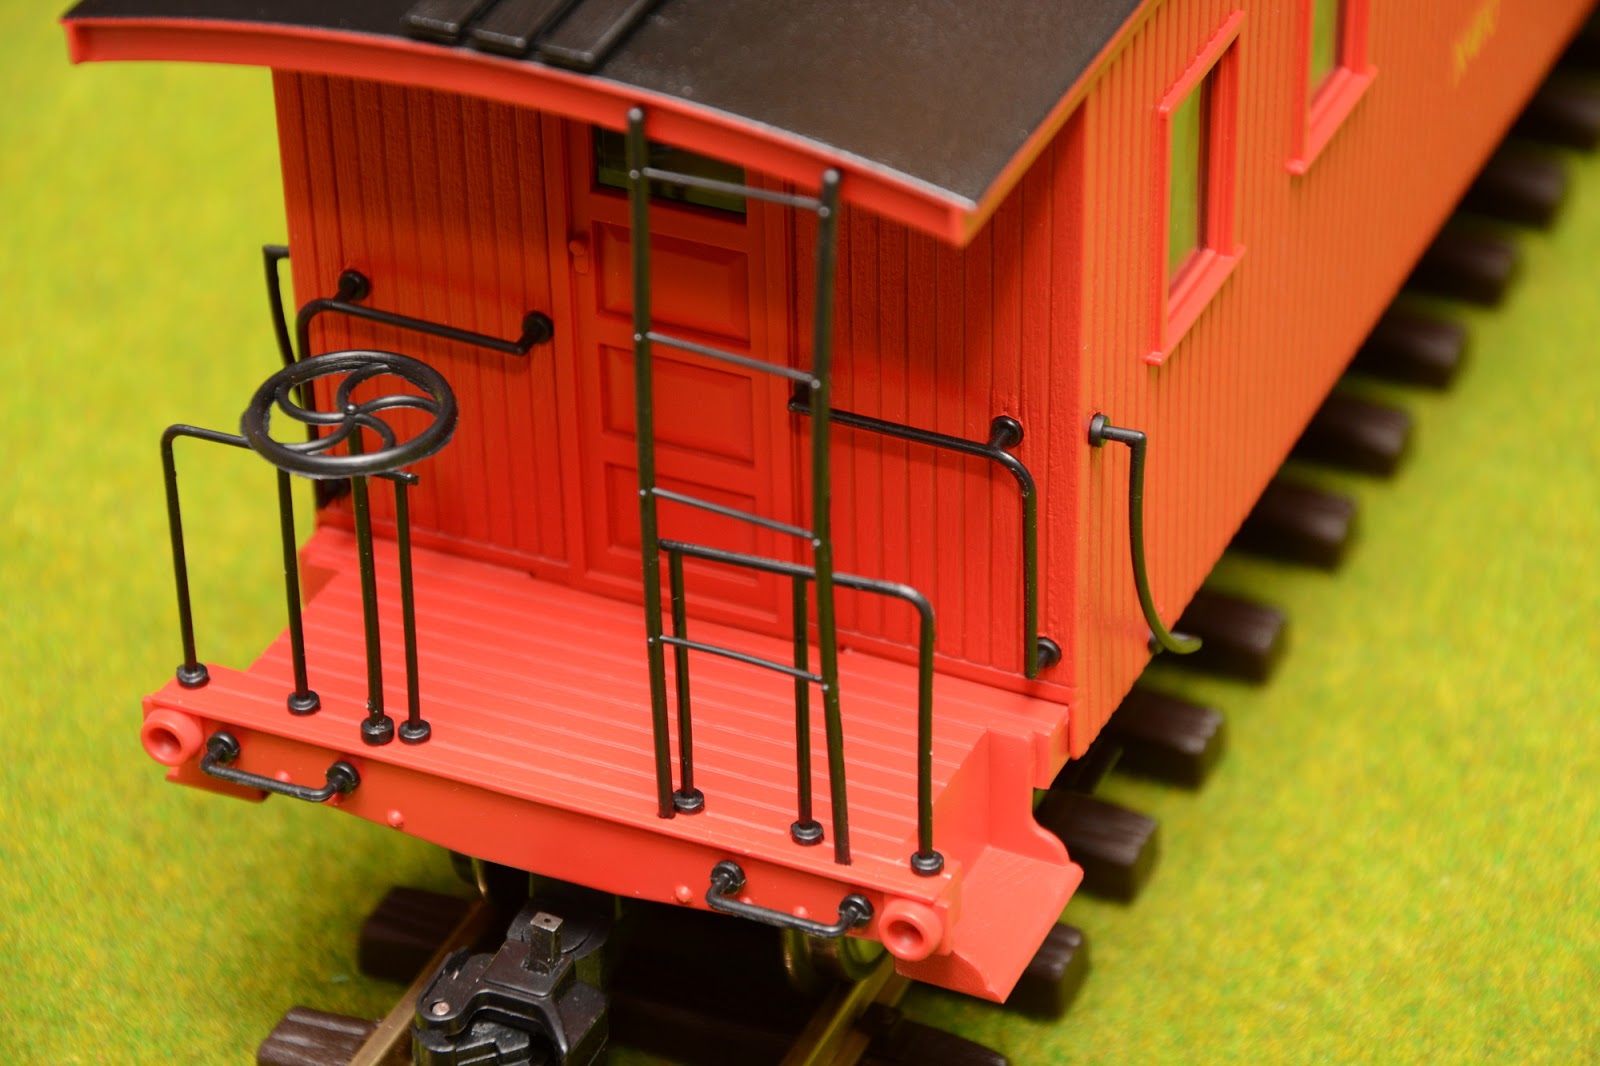
Let's take a look at the photos of the car.


Well, it's definitely very, very red but also pretty decent looking!

The car is mostly made of quality plastic that feels good in hand. The exception are the details: handrails, ladders, etc. where a much softer material is used. This fact is actually visible even in the above photos - some of those elements are slightly bent or not standing straight at all.

The paint scheme is very simple. The car is red with logos on the sides. Nothing really to complain about - that's the way the American cars are...

It's very nice to see that Bachmann continues its support for metal wheels also in the G-Scale. The wheels are heavy and solid. It's just a pity they do not support picking the power from the track - this would be very much appreciated in case of a passenger car.

The model comes equipped with knuckle couplers. Luckily LGB-style couplers are included, too. A short manual explains their installation.


This is what the car looks like after the couplers are replaced.


Unfortunately after the change, the model does not fit in its box any more. I had no choice but to use the knife and make a necessary packaging-upgrade.


Summary

I'm pretty happy with my choice. There are things one could complain about (bent details) but all-in-all the model does look nice and solid. I'm making that statement however considering the fact that I've paid only $30 for the car. Had I paid the full price, I would have been seriously disappointed with those imperfections. Another reason to always look/wait for a good offer when making a purchase!

Sunday, 1 May 2016

Garden works, part 9: More stones, more stones!

There hasn't been much news on my blog recently, but I was definitely very busy working on my garden layout. The spring is here and I could finally pick up where I left off last autumn. So let's recall what the status was back then...

The is the last photo I took in 2015. The wooden frame for my elevated layout is ready but is empty inside. And of course the next planned step is to fill it with stones...


So we're in 2016 now and the stones have arrived. On April 15th 10 tons of material have been delivered to my house. This is what it looked like after unloading from the truck:


The next photo is from May 1st. In exactly two weeks the stones have been transported (using a wheelbarrow) to my garden and poured into the wooden frame. The progress is definitely visible but it's also clear one or two more deliveries will be needed.


I also remembered to install the electrical connections before filling my elevated layout. I have a pipe holding three independent cables inside to allow powering the track, the lights, and... something more. This solution - theoretically - allows installing even more wires in the future.


The pipe actually starts right next to my house wall and goes under the paved terrace in my garden. My wife will be very happy about it, as no cables will be visible at all. It's looking really good!


Next step: another 12-15 tons of stones. And another 2-3 weeks to carry them using a wheelbarrow. I really hope I will be able to show the finished layout base in my next blog update :)